


 {bookcase styled by Lili Diallo}
Remove everything from the shelves and while you're at it dust the shelves and the books. Be honest with yourself, there's no telling when you'll get around to doing it again.
Step 2 - Edit Your Selection
Donate the books you will never read again and store those well worn/read paperbacks. Try stashing them in one of the storage solutions mentioned here. Remove the jackets from your hardback books. Removing the covers instantly reveals a clean and sometimes colorful book. Store the covers elsewhere.
Step 3 - Sort Books by Size and Subject
Step 4 - Place Books on Shelves
Instead of placing all of the books vertically, create a few horizontal stacks to add visual interest. Note that taller books often look better horizontally.
Step 5 - Fill Unused Space
If you have extra space add colorful storage boxes, small-scaled sculptures, vases, or framed photos to break the monotony of books.
Step 6 - Step Back and Reevaluate
Does the bookcase look too heavy on one side? Do you have too many books on the shelf? Always leave each shelf with about 10-15% open space. If you find that you have over accessorized remember this piece of advice from Coco Chanel, "When accessorizing, always take off the last thing you put on." This rings true not just in fashion, but also in decorating!
Step 7 - Admire Your Handiwork
You will probably continue to edit and rework a few pieces here and there until you are totally comfortable. You've completed this task quicker than expected, right?
**Extra Credit** Now that you have a little time on your hands consider wrapping a few books in colorful wrapping paper for added panache!
 {image courtesy of Domino Magazine}
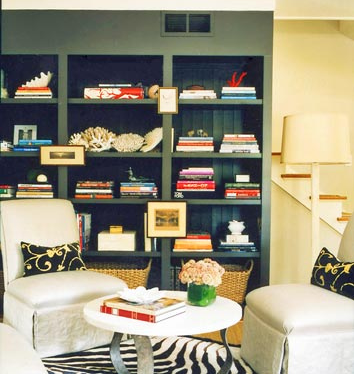 {image courtesy of Domino Magazine}
Send me pictures. I'd love to see what you've done!


 2 Comments


